Add teammates and organize message handling
Give the right people access to customer conversations.
Before you start: Have each teammate’s name, work email and intended role ready.
Invite a human agent
Open Settings → Agents → Add Agent.
Enter the teammate’s name and email address.
Choose a role that matches their responsibilities.
Select Add Agent.
Ask the teammate to complete the invitation and sign in.
Enter the name, role and email before submitting the invitation.
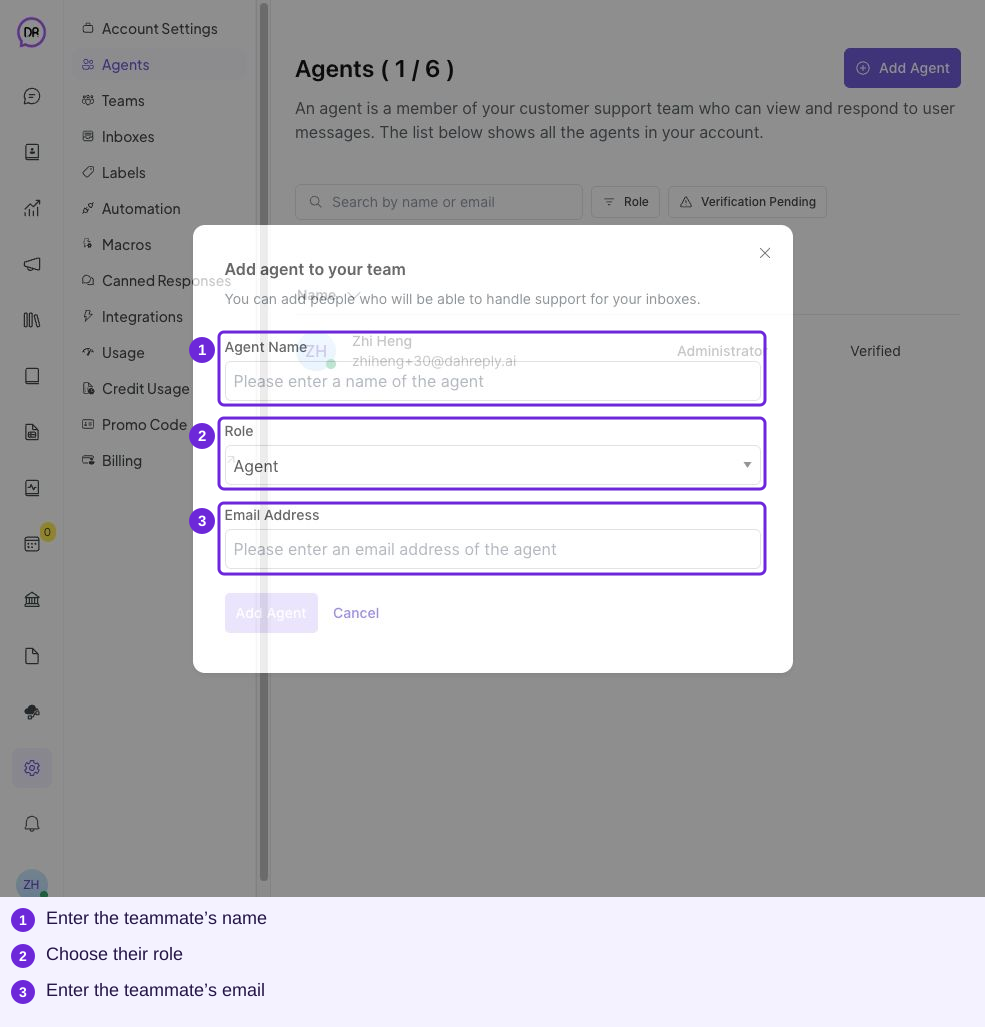
This is the invitation form before submission.
Create a team
Open Settings → Teams → Create new team.
Give it a recognizable name, such as Reception, and a short description.
Review Allow auto assign for this team and the menu access permissions.
Select Create team, then add the relevant human agents in the next stage.
Complete the setup.
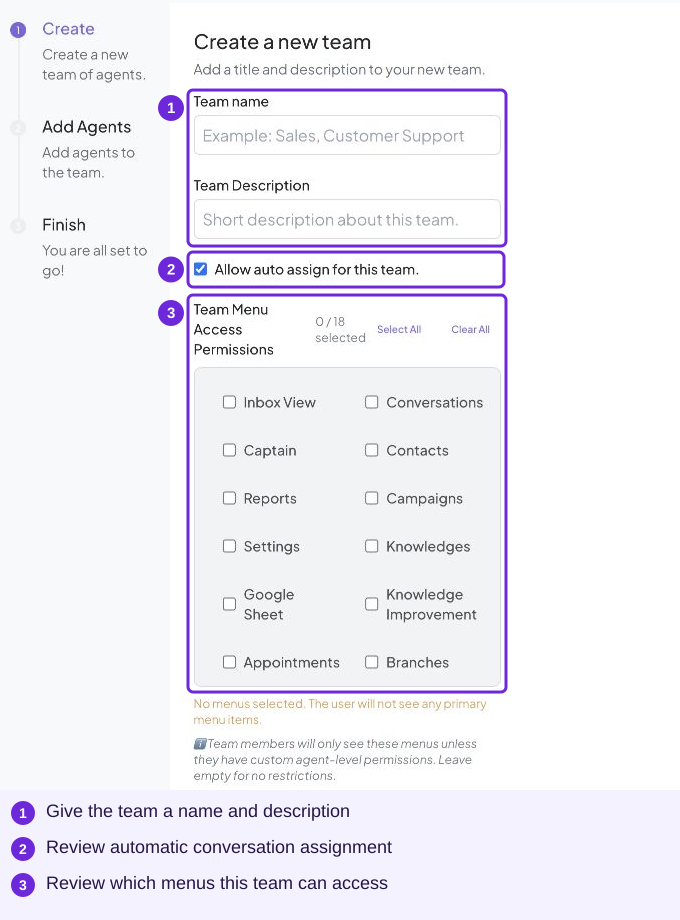
This is the first team-creation stage. Review assignment and menu access before creating the team and adding agents.
Add people to an inbox
Open Settings → Inboxes → your inbox → Collaborators.
Select the people who should handle this inbox under Agents.
Select the Update directly below that selector.
Review Conversation Assignment separately if you want incoming work assigned automatically.
Ask a teammate to open the inbox and a sample conversation.
Inbox membership and automatic assignment have their own settings and Update buttons.
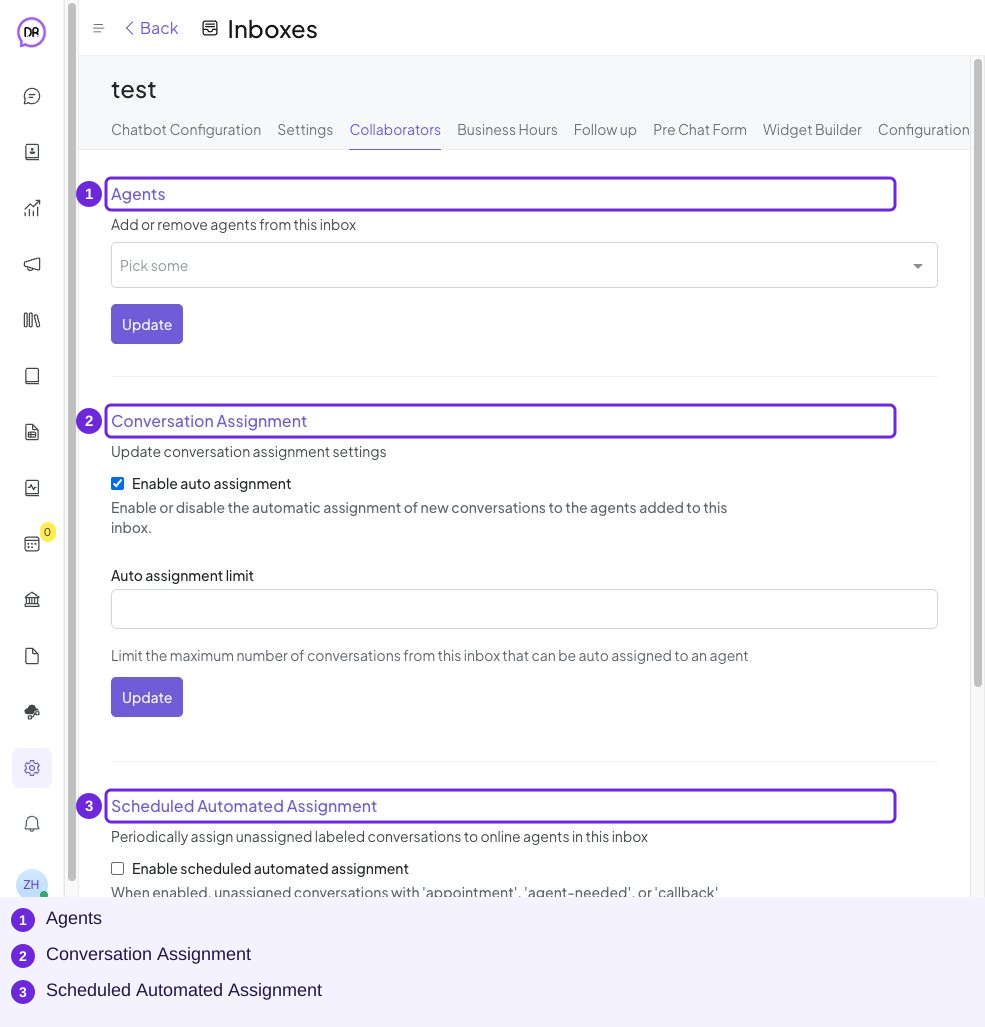
Inbox Collaborators determines which teammates participate in this inbox.
Try it
That inbox’s Collaborators tab, then add the receptionist under Agents.
You are ready when
- My teammate can sign in and see the intended inbox.
- Responsibility for unanswered enquiries is clear.